
Friday, June 24, 2011
As featured in the KC Weddings Magazine!
Thursday, June 9, 2011
Summer projects so far!
I started this blog only to forget about it! But life has been pretty upbeat this summer. Lots of wonderful things to share.
Here are some table numbers I made for the wedding of a Harvard alumni. She asked me to recreate a font someone else had used to create her invitation. I also addressed her invitations, and calligraphed escort cards and menus for the day of the wedding (Congrats hun!). I thought the font was fun and super easy to copy --a great project to work on.


Here are some table numbers I made for the wedding of a Harvard alumni. She asked me to recreate a font someone else had used to create her invitation. I also addressed her invitations, and calligraphed escort cards and menus for the day of the wedding (Congrats hun!). I thought the font was fun and super easy to copy --a great project to work on.


 | |||
| Aren't her vintage stamps gorgeous? They really add to the style of the invitation. |
I also did the calligraphy for one of my best friend's wedding in Dallas, TX. His family is from Guatemala, so there were a lot of Central and South American addresses. Pretty awesome. Maybe I'll get pictures from the wedding to show you guys. They are a very hip, modern couple, and decided they would have a bright red and orange wedding. Unusual, fun, and somehow incredibly elegant. Totally fell in love with it.
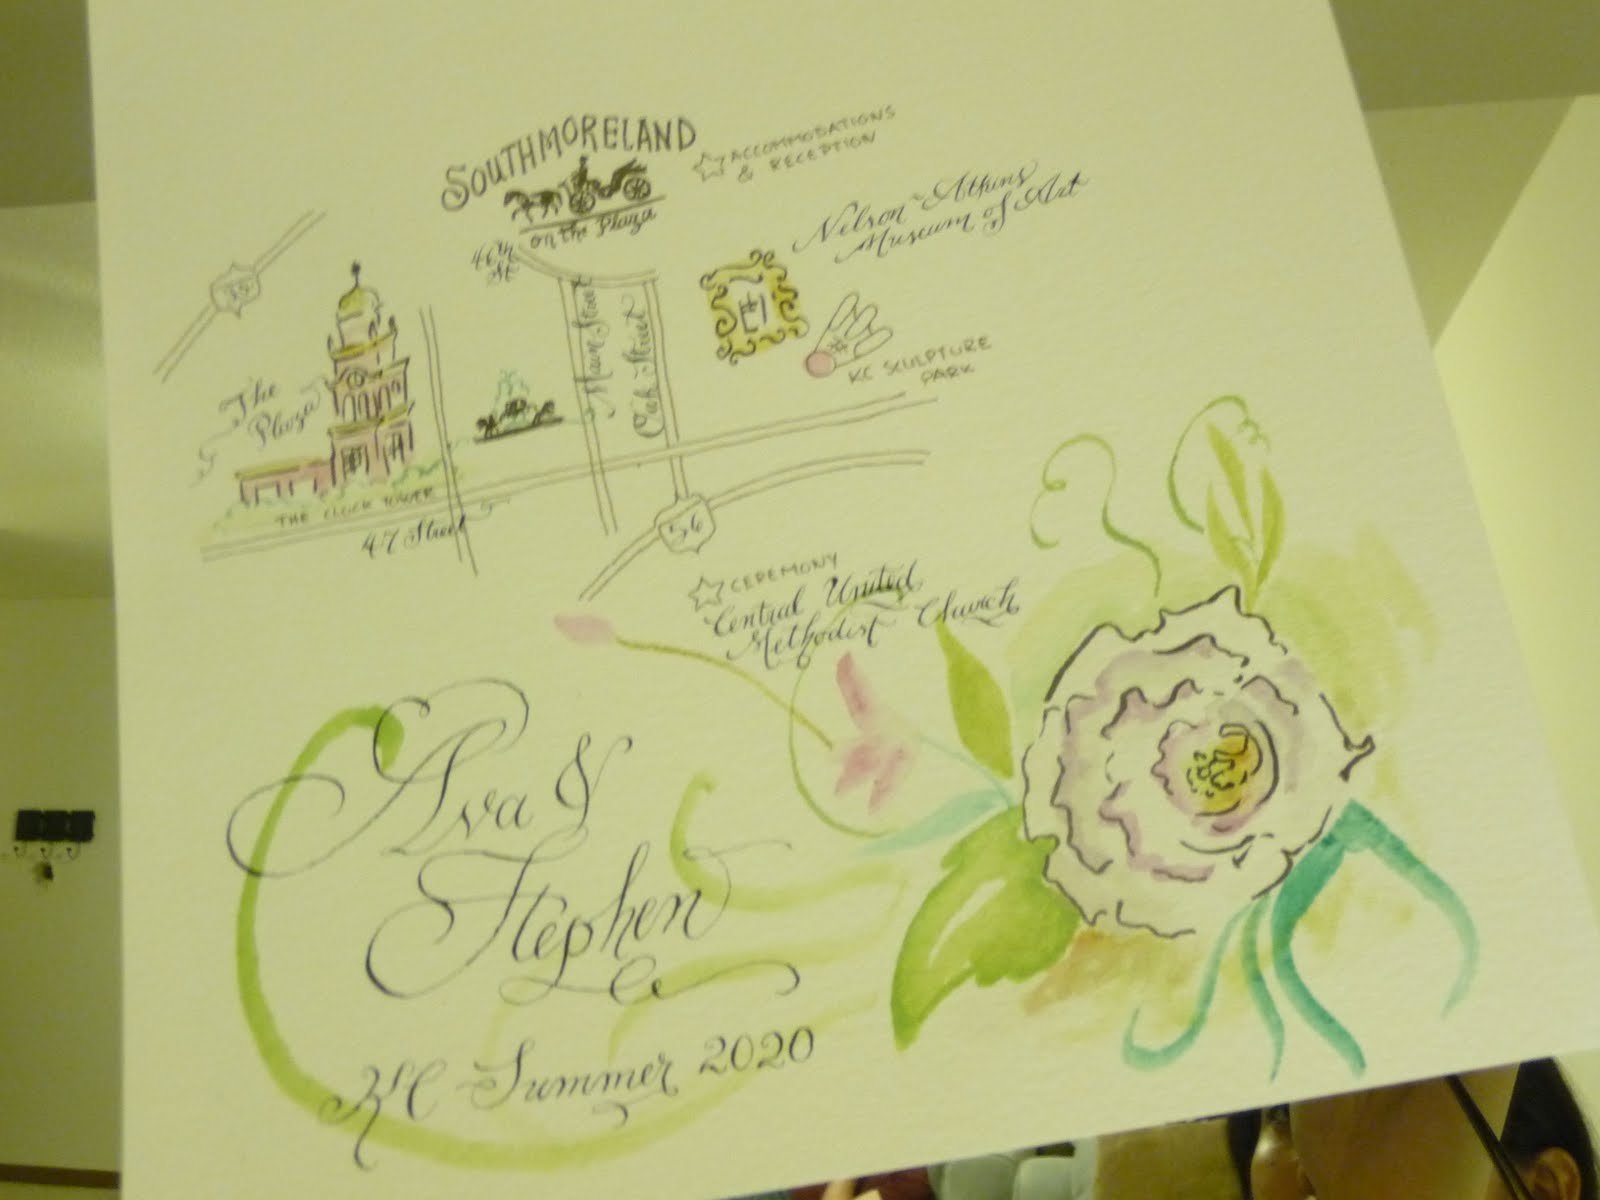
I have been working on some wedding maps as well, and I was especially excited about the maps I watercolored and lettered for the Kansas City Bride Magazine. Here are a couple pics I took... they're not so great, so I hope to be blogging about this with pics of the magazine spread soon!! They really are beautiful. I tried to keep them simple, but elegant, so that I could focus on the calligraphy of the maps.
 |
| Trying to conquer watercolors! I thought this flower motif turned out quite pretty. I decided it'd go on the lower corner of the map. It adds a lot of color and flair to the otherwise understated elegance of the map. |
Friday, February 4, 2011
Budget Calligraphy!
Hello budget brides! As you know, I am a vendor, but once upon a time I was also a bride (almost two years now!!) Well, I wanted to talk about budget calligraphy, and give you a few tips. You shouldn't go without the most important touch of elegance just because of your budget!! Calligraphy gives your invitations a very chic touch, and is a wonderful way to show off your personality and style. AND (did you know?) you can do it for as low as $1 per invitation! Here are a few things you can do:
1. Save up to 50% by printing your return address. Ask your invitation vendor to print your return address on the envelope for free. Many small vendors will be glad to do it if it helps you make your decision (it's a very low cost for them and they want your business!). If this is not an option, you can print the back of your envelopes yourself (here is some help. Make sure you have enough envelopes to mess up a few).
I know this might seem like a huge no-no, but take it from a calligrapher who has seen many top-notch brides go without calligraphy in the return address. Though it is technically not as elegant, many people won't even notice! We all look at ourselves first after taking a group picture, don't we? Your guests will mostly care that their names be written beautifully, by a skilled professional -they will be impressed.
2. Get your invitations early, so you can book your calligraphy during dry season, namely September-February. Because dry season is SO prolonged, I like to give a $1 Christmas sale, for example. Many calligraphers will be happy to negotiate prices during off season too. If you are making your own invitations and you know what size they will be, you can even buy envelopes ahead of time and send them to your calligrapher (keep in mind that this will force you to stick to your plan! If you are not good at sticking with your plan, wait till you make your invitations!). Don't worry about address changes -few people move during this time, and if out of 100 guests, 2 people move and you have to re-do their addressing, it is still worth the good price!
3. Find simple fonts. The calligraphy pen(s) used for a font makes a huge difference in price. The use of a flexible nib (the point of the pen that makes for VERY different widths in the line and even draws the "hairline" flourishes) will almost always mean a higher price. After that, the flat point pens also make for pretty differences in line, but they are not dip pens, but cartridge pens, so it takes a lot less time to hand-letter things with them. They are a little less expensive. Finally, there are the artist's pens, or even gel pens, which are basically regular writing pens (though hopefully a little on the nicer side). If you pick the right font (any font can be written with this type of pen of course), this can make for a beautiful and budget friendly alternative!!
P.S --Take advantage of sales! Look for my shop on Etsy!!
Thursday, January 20, 2011
Famous Addresses: Finding Nemo

I've been working on a famous addresses project, and my sister told me I should pen the dentist office's address from Finding Nemo, which I thought was just adorable. It has no zip code because, well, it's sadly not a real address. But it was a lot of fun to write.
I think the font matches the theme well. I chose to space out the lettering in a flowy pattern, and the curly flourishes remind me of water waves. This is a new font I've been working on -it's a basic Copperplate, except for the ascender (the upper vertical portion of long letters such as l, t, or f), which is much rounder and more accentuated, and some of the capital letterforms (such as P and A) braking formal patterns for the sake of mimicking the new "fatness" of minuscules. I love it!! Oh, little Squirt on the left was watercolored.
Sunday, January 16, 2011
A bride's guide to writing a guest list (for Calligrafia Bella clients)
This guide is especially written for my clients, but I trust it will be helpful to any other brides as well. If you are interested in my calligraphy services, you can check out my calligraphy website at Caligrafiabella.com. If you are looking for advice on how to put together a guest list for your own records, check out my organizational post on that topic here.
Please email me a Word document.
If you are already a client, I have probably asked you for a digital Word document (which you can email to me at caligrafiabella@gmail.com). If you followed the previously mentioned post and/or have an Excel document, you can copy-paste that information into a new Word document. The Excel template's purpose was to help you, the bride, get organized. It includes information you may not wish to share with me (such as budget and rsvp info) and omits very important calligraphy-related information (such as etiquette preferences for inner and outer envelopes). I also prefer Word because your guests' names and their respective addresses will be directly adjacent, so it is less likely that I will confuse people's addresses. Your emailed Word document will be our contract, and I guarantee that your envelopes will have the exact spelling as your Word document.
Example:
Mr. Sherlock Holmes
221 Baker Street, Apartment B
London, England
E152TF
Mr. Holmes and Guest
Don't forget to place your RSVP/return address at the very top of the list!
* You should omit the woman's first name unless she has a title (example: "Mr. and Mrs. John White," or "Mrs. John White" for a widow).
* Unmarried couples living together can be listed in two ways:
You can list the person you are closest to first, or you can list them alphabetically.
* Two siblings living together should be listed in order of birth.
* As should be the children being listed under their parents in an inner envelope. If Audrey is 8, and Tony is 4, your inner envelope could read:
Mr. and Mrs. White
Audrey White
Anthony White
or
Mr. and Mrs. White
Audrey and Anthony White
The longest (first) option is the most formal, but the second is the most commonly used.
* Notice in the above examples that only the main invitees' last names are used in the inner envelope, their first names have already been used in the outer envelope.
* If two doctors (or two people with a title) are married, you can list them in two ways: "The Doctors White" or including the lady's first name "Dr. John White and Dr. Emma White (most formal)"
If you have any questions, don't doubt to call me, email me, or comment on this post. Remember that addressing etiquette rules are only a guide. Thank goodness these are modern times, and most people understand that it's your wedding, and therefore it's also your rules. Some people wish to have a cozier wedding and prefer to send invitations addressing their loved ones as "Aunt Betty" and "Grandma Rose" and that is also a perfectly acceptable decision to make. The most important thing is for you to be satisfied with the level of formality (or lack thereof).
Please email me a Word document.
If you are already a client, I have probably asked you for a digital Word document (which you can email to me at caligrafiabella@gmail.com). If you followed the previously mentioned post and/or have an Excel document, you can copy-paste that information into a new Word document. The Excel template's purpose was to help you, the bride, get organized. It includes information you may not wish to share with me (such as budget and rsvp info) and omits very important calligraphy-related information (such as etiquette preferences for inner and outer envelopes). I also prefer Word because your guests' names and their respective addresses will be directly adjacent, so it is less likely that I will confuse people's addresses. Your emailed Word document will be our contract, and I guarantee that your envelopes will have the exact spelling as your Word document.
The basic format is as follows:
List complete names (no nicknames), fully spelled addresses (no abbreviations) and add the names you would like to include in the inner envelope last. Example:
Mr. Sherlock Holmes
221 Baker Street, Apartment B
London, England
E152TF
Mr. Holmes and Guest
Don't forget to place your RSVP/return address at the very top of the list!
The basic etiquette rules are these:
* List the household head(s) in the outer envelope and their guest or children in the inner envelope (see example above).* You should omit the woman's first name unless she has a title (example: "Mr. and Mrs. John White," or "Mrs. John White" for a widow).
* Unmarried couples living together can be listed in two ways:
You can list the person you are closest to first, or you can list them alphabetically.
* Two siblings living together should be listed in order of birth.
* As should be the children being listed under their parents in an inner envelope. If Audrey is 8, and Tony is 4, your inner envelope could read:
Mr. and Mrs. White
Audrey White
Anthony White
or
Mr. and Mrs. White
Audrey and Anthony White
The longest (first) option is the most formal, but the second is the most commonly used.
* Notice in the above examples that only the main invitees' last names are used in the inner envelope, their first names have already been used in the outer envelope.
* If two doctors (or two people with a title) are married, you can list them in two ways: "The Doctors White" or including the lady's first name "Dr. John White and Dr. Emma White (most formal)"
If you have any questions, don't doubt to call me, email me, or comment on this post. Remember that addressing etiquette rules are only a guide. Thank goodness these are modern times, and most people understand that it's your wedding, and therefore it's also your rules. Some people wish to have a cozier wedding and prefer to send invitations addressing their loved ones as "Aunt Betty" and "Grandma Rose" and that is also a perfectly acceptable decision to make. The most important thing is for you to be satisfied with the level of formality (or lack thereof).
Saturday, January 15, 2011
How to put together your guest list
Putting your wedding list together is an important part of the wedding planning, but it can also be a source of stress. It really shouldn't be. Here are six simple steps to getting through this process with a smile:
1. Decide on a budget and number of guests
2. Write a preliminary list
3. Organize your list
4. Hunt for information
5. Weed out the absolutes
6. Get a final count

You should also ask your fiancee for his list. Ask him to include addresses to save yourself some address hunting time! If your fiancee's strongest point is not organization, it helps to give him a reasonable and friendly due date and follow up with him.

If your fiancee or other member(s) of your family are helping you with this, try posting your guest list on GMail's document sharing system (or any other similar web resource), so you can all add information to the same document.


1. Decide on a budget and number of guests
2. Write a preliminary list
3. Organize your list
4. Hunt for information
5. Weed out the absolutes
6. Get a final count
1. Decide on your budget and number of guests.
Unless you have an unlimited budget, all wedding decisions will probably stem from this very first choice. If you have this one down, move to the next step! If you haven't decided on your budget, you will have to do this beforehand, so get your spouse (and/or anyone else paying for the event), a calculator, and decide on a budget. This is a decision that must be made from the start (try to stick to it!). Once your wedding banquet budget makes sense in relationship to all other expenses, you can decide on a number of guests. Call a few of the wedding venues and you've been thinking of and get a few price estimates. Think of how much money per guest you are willing/able to spend. And finally, decide how many people you wish to invite. Decide what percentage or number of invitees other people (your future spouse, your parents and/or future parents in law, for example) will be able to invite, and communicate that decision to them. About 25% of your invitees will decline.2. Write a preliminary list
Open Excel, save the blank document as "Wedding Invitee List" (or download my template if you rather not do the editing in step 3) and get to work! Label column C "Invitees" and brainstorm -don't worry about anything else right now. It doesn't even matter if you're not very proficient with Office (I'll keep it super simple). Just make sure everyone you want to invite is on your list. Use one line per invitation: include all members of the Robinson family, for example, in one line. This will keep your list visually concise and easy to manage. Unless you enjoy it, leave the editing for later -the important thing is to get you started. 
You should also ask your fiancee for his list. Ask him to include addresses to save yourself some address hunting time! If your fiancee's strongest point is not organization, it helps to give him a reasonable and friendly due date and follow up with him.
3. Organize and edit your list
Start out by giving your list a little face-lift. You can add a few useful columns (and fill them in as you are able): a column to help you tally up the number of possible guests and invitations, a column for addresses, and a column for RSVPs. You can also edit the first column to differentiate your invitees from your husband's invitees, your parents' and his parents' invitees. This will help you check and balance the number of people that each of you invites. Finally, add a Total under each section so that you can consult your numbers as RSVPs and other data reaches you (use the autosum feature). If your venue is charging you per plate, you can also get an approximate total cost for your wedding banquet (don't forget to include yourself and your spouse if you do this).
4. The information hunt
Once you are done organizing your guest list, it is time to hunt for all the necessary info. Get your fiancee's list (and anybody elses' who has one). Find out the correct spelling and titles for all your invitees. Here is a link to my favorite addressing etiquette for your convenience. Before you call people to ask about spelling or for their address, check your list for nicknames (you want to find out their real name) and for any guest names you may be missing (like their children or significant others). If you are including an inner envelope in your invitation, this will save you more than one email or call -and a whole lot of time! If your fiancee or other member(s) of your family are helping you with this, try posting your guest list on GMail's document sharing system (or any other similar web resource), so you can all add information to the same document.
5. Weed out the absolutes
You probably have an idea of who your absolutes are. Your absolutes are people who absolutely will or will not come. Maybe Aunt Louise's doctor told her to stop traveling because of her age. And your BFF Anna would not miss your wedding if it was her last day on Earth. Fill in those numbers under the "Total possible guests" column. This will give you an approximate minimum number of people you should be ready and able to seat at your wedding. The RSVP column will give you a confirmed number, but you will have to wait till your planning time is mostly over for that information, and it's useful to have a number early on. 
6. Get a final count.
You have done most of the work! Now it's time to make sure you have your numbers right. Decide whether or not to send out an invitation to the "absolute not"s and eliminate any people you cannot afford to invite. Make sure your final count makes you and your loved ones happy and comfortable, even if it means making a couple tough decisions. Above all, remember to enjoy the process. You only get to do this once ;) ! 
Tuesday, January 11, 2011
Cara Rose Photography
Last December my friend Cara from Cara Rose Photography did quite an impressive job of capturing my calligraphy.. She took such beautiful pictures that I have decided to update my catalog to include them. Aren't these gorgeous?? Check out her flicker photostream. Yay for artistic friends!! She's a personal fave.


Subscribe to:
Posts (Atom)